Teal pumpkins are becoming more popular with each Halloween season and with good reason. Projects and signs are getting more and more creative to display teal pumpkins for trick-or-treaters. Today, we are doing to show you how we made a Teal Pumpkin Project Banner using felt. It is super affordable at less than $3.00 and easy to hang on an outdoor light or command hook. Using felt also makes the sign easy to roll up and store for next year. A free pumpkin template is provided to download in the step-by-step tutorial below. This project idea is wonderful for learning to sew, especially if you have been intimidated by trying out a free motion foot. Test your stitching on this inexpensive felt banner rather than an entire quilt top.

Ready to make a felt teal pumpkin banner? Let’s get started!
Supplies

This project requires 2 pieces of felt. The background piece is designed to use a single 12″ x 12″ felt sheet to keep things easy. It can be any color you choose. We used navy blue for the example. Teal felt is needed to make a teal pumpkin, but feel free to switch that up for a different vibe as well. You could do traditional orange or a white pumpkin for a farmhouse look.
Teal Pumpkin Banner Sewing Tutorial
Step 1 – Download Template
The first step in the teal pumpkin banner sewing tutorial is to download and print the template for our banner. Make sure you choose the correct paper size and print full-scale. Once you have your template, we can use it to cut out our fabric.
Step 2 – Cut out Template
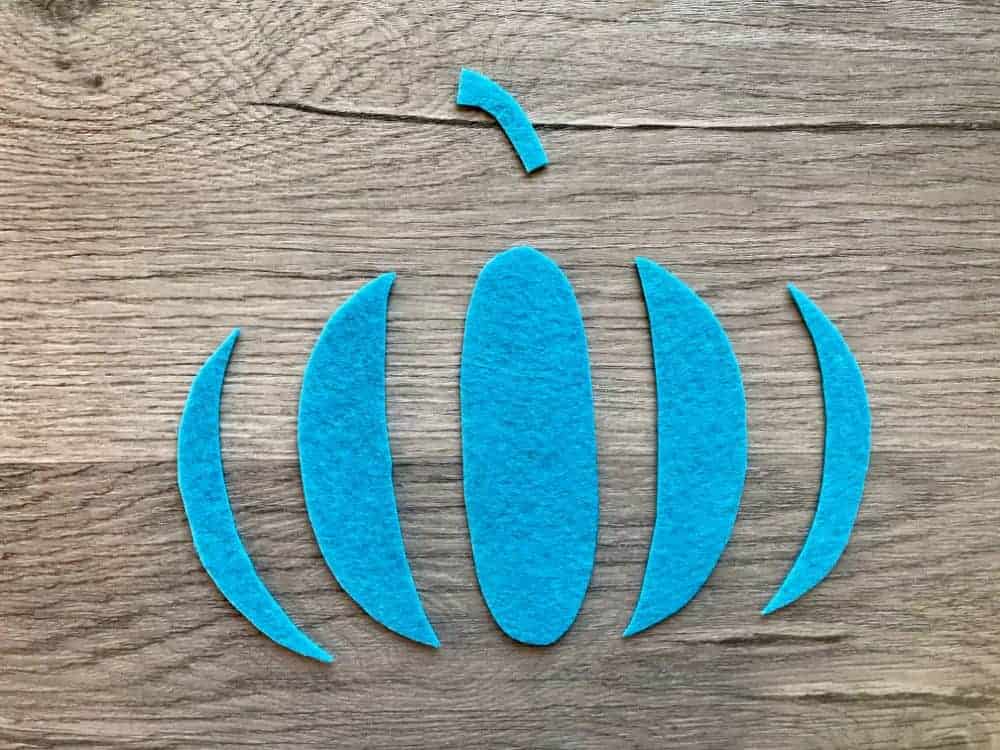
Cut out the paper template, and trace it onto your felt fabric. I used teal felt for this project, but you can use any color you would like. Once you have the template traced on your fabric, you can cut it out carefully using scissors or a rotary cutter.
Step 3 – Create Banner Background

Next on this teal pumpkin banner sewing tutorial, we need to create the banner background. Take your felt fabric that you are going to use for the background and fold down one side by 1″ all the way across and pin it in place.
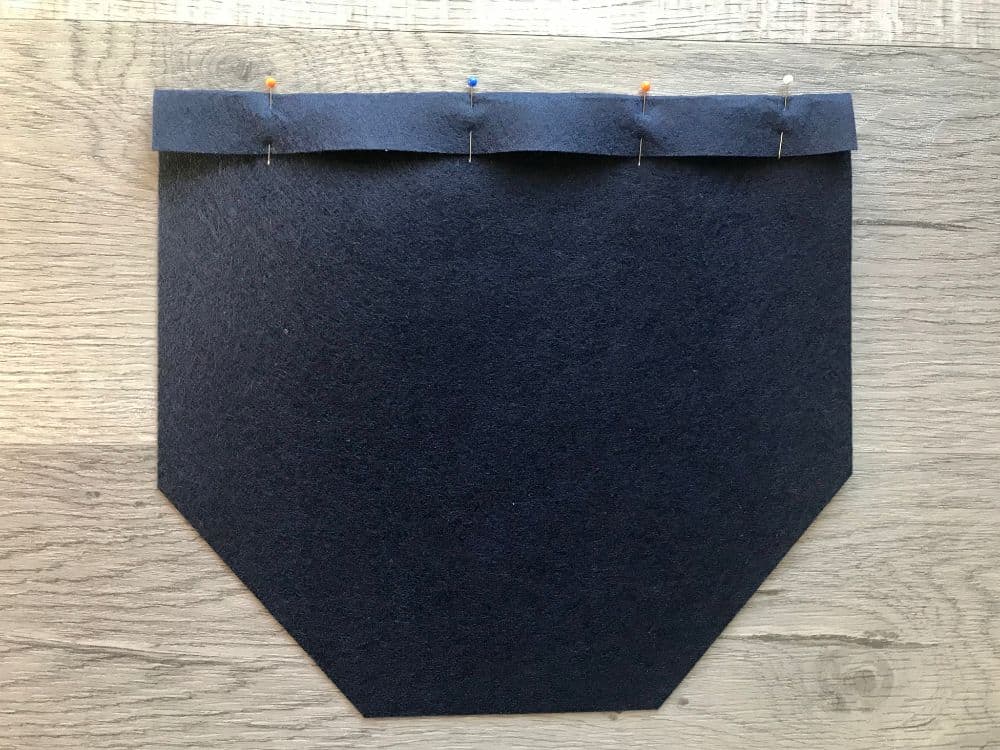
To give your pumpkin banner it’s shape, measure 3″ in from each of the bottom corners, and 3″ up each side. Cut from point to point to form the bottom of the banner.
Step 4 – Place Pumpkin Pieces
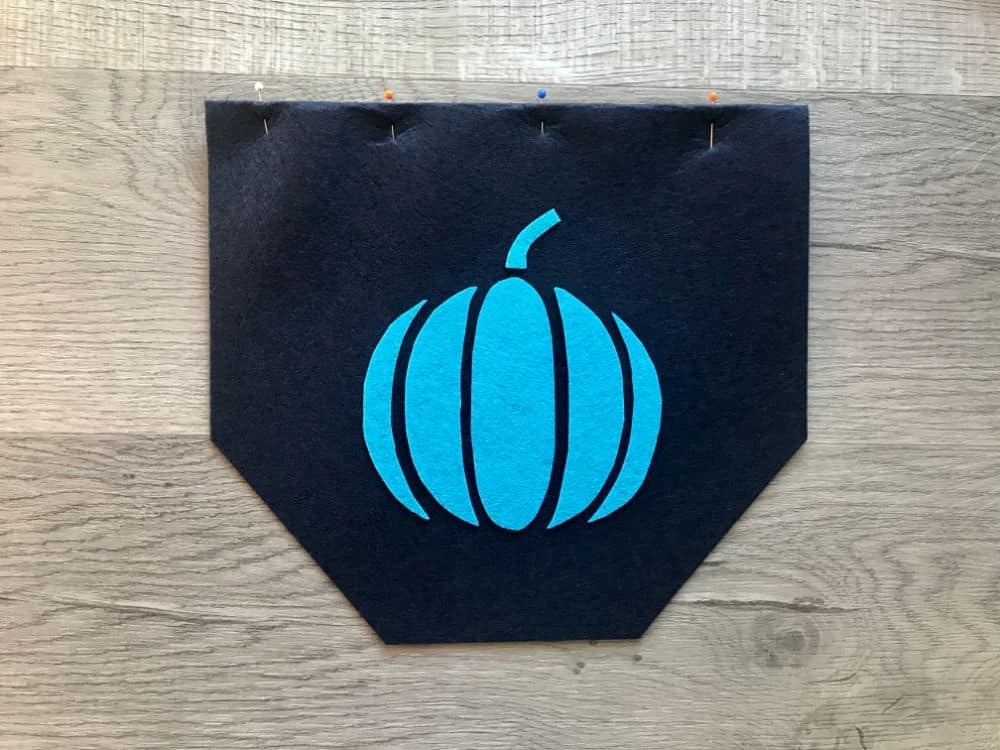
Next on this teal pumpkin banner sewing tutorial, it’s time to put them together. Lay the cut out felt pieces in the center of the background to form a pumpkin.
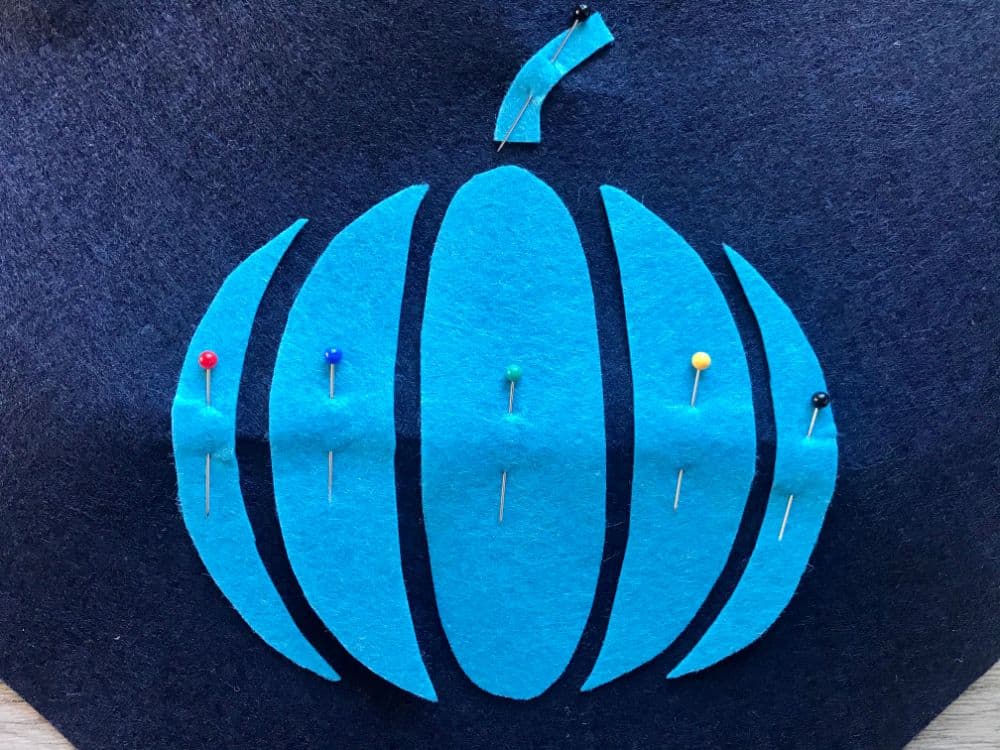
Pin each felt piece in place. We will sew it in the next step.
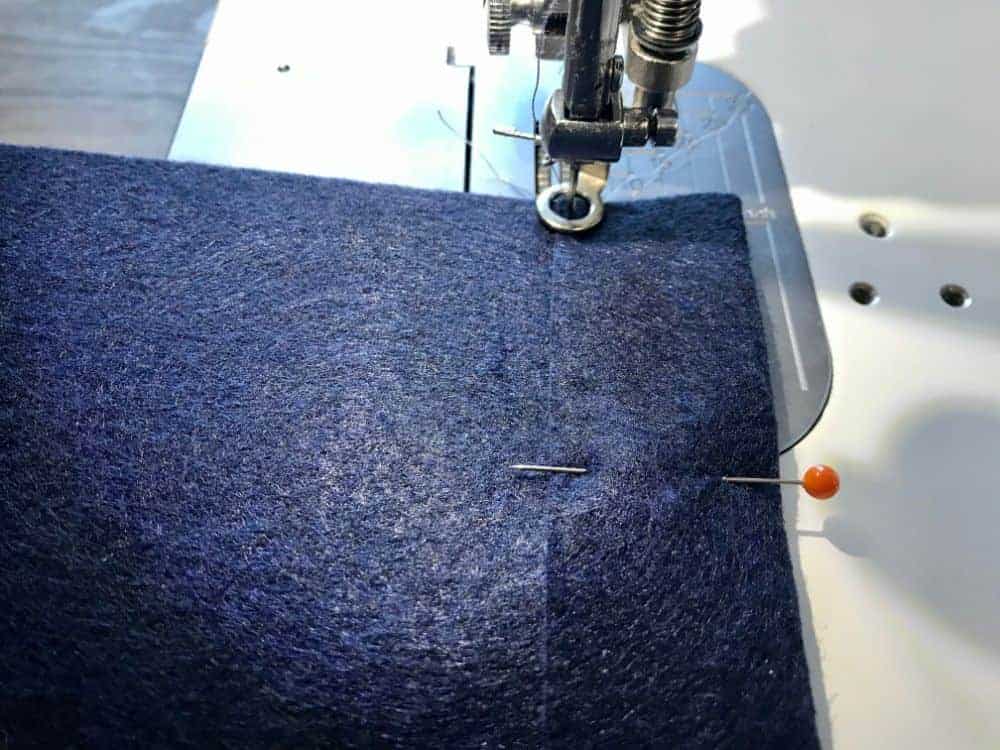
Step 5 – Sew Felt

Now on this teal pumpkin banner sewing tutorial, we need to attach the pieces to the background. Using a free motion foot for your sewing machine, stitch around each felt piece. Free motion simply means the feed dogs on your sewing machine are in the down position, so the fabric can be moved in any direction. Don’t let it intimidate you! If this is your first time trying free motion sewing, just remember it’s only fabric. You can always try again for the cost of pennies.

You can get creative and stitch designs inside or outside each felt piece. This project can be as simple or involved as you choose.
Step 6 – Assemble Background
Next on this teal pumpkin banner sewing tutorial, sew along the bottom portion of the background where it is folded over to form a casing as well. This can be down with a regular presser foot or a free motion foot.

Insert a dowel into the casing that extends at least 1″ past each edge of the banner.
Step 7 – Hang the Banner

For the last step in out how to make a teal pumpkin banner sewing tutorial, cut a ribbon to your desired length for hanging. Then tie it around each end of the dowel. And that’s it! Now you know how to make a teal pumpkin banner! Your teal pumpkin banner is ready to be hung in preparation for trick-or-treaters! This really is a cute and fun craft the kids will love.
What Does a Teal Pumpkin Mean?
According to foodallergy.org, “The Teal Pumpkin Project is a movement to raise awareness of food allergies and to create a safer, more inclusive Halloween for all trick or treaters on Halloween. By putting a teal pumpkin on your doorstep, you let kids know that your house is food allergy-friendly.”
Teal Pumpkin Treat Ideas
Here are some items you can have on hand in place of candy this Halloween to participate in the Teal Pumpkin Project. Kids and parents alike will appreciate the effort.
- Bubbles
- Glow sticks
- Spider rings
- Pencils
- Erasers
- Crayons
- Bouncy balls
- Stickers
- Whistles

If you liked learning how to make this teal pumpkin banner, make sure to pin it to your favorite Pinterest board or share it with friends on social media. If you decide to make this simple project on your own, make certain that you take a picture afterward and tag us on social media as we love seeing the fabrics and color choices that people use!
Teal Pumpkin Project Banner

How to make a Teal Pumpkin Project banner using felt.
Instructions
- Download and print template.
- Cut out template.
- Trace template onto felt.
- Cut out felt pieces. Set aside.
- Turn one side of background felt sheet under 1" and pin.
- Mark 3" from bottom corners on both sides.
- Connect marks and cut to form banner shape.
- Lay out felt pieces on background as desired.
- Pin in place.
- Sew around each felt piece with free motion foot.
- Sew across bottom of turned down background to form casing.
- Insert dowel through casing. Trim as desired.
- Tie ribbon to each end of dowel.
- Hang banner and enjoy.
Notes
Use any felt colors you'd like to customize your banner.
Recommended Products
As an Amazon Associate and member of other affiliate programs, I earn from qualifying purchases.
-
 Grabbit Magnetic Sewing Pincushion with 50 Plastic Head Pins, Lime Green
 -
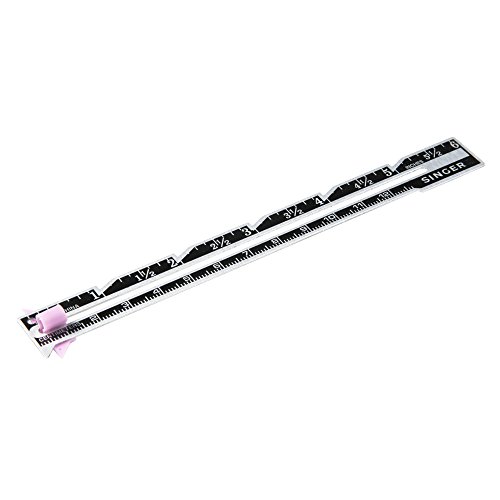
SINGER 00220 Sewing Gauge, 6-Inch
-
Wooden Dowel Rods - 3/8" x 36" Unfinished Hardwood Sticks - For Crafts and DIY'ers - Craftparts Direct - Bag of 25
-
LaRibbons Solid Color Satin Ribbon Asst. #2-10 Colors 3/8" X 5 Yard Each Total 50 Yds Per Package
-
3-PACK - Aurifil 50WT - White + Dove + Light Beige, Solid - Mako Cotton Thread - 1422Yds EACH
-
flic-flac 48PCS 12 x 12 inches (30 x 30cm) Assorted Color Felt Fabric Sheets Patchwork Sewing DIY Craft 1mm Thick … (30cm 30cm, 48pcs)