Today on Beginner Sewing Projects, we have a fun project that is perfect for summer! We are going to show you How To Make A Stretchy Headband With Knot! Headbands are one of the absolute easiest sewing projects anyone can make. This headband is super comfortable. The stretchy fabric is forgiving, and all the stitches are hidden. Don’t worry if they aren’t straight! (Here are some clever things to help you sew a straight line if you need them though.)This style of headband features a faux knot, sometimes referred to as a turban headband. It adds a nice touch to your headband and makes it stand out from just a simple design. I love wearing headbands in the summer to keep my hair out of my face so I can stay nice and cool. You can make this headband with knit fabric or even use an old t-shirt you have laying around. The best part is that you can make this fun stretch headband in about 15 minutes for a fraction of the cost you would pay in-store. This is a great project to make several off in different colors or prints to match different outfits. You could even give some away as gifts.

This is one of my favorite projects to make simply because it is quick and easy to do. My girls love this headband and I love that it doesn’t break the bank to make them new headbands everytime one gets lost.

What You’ll Need:

- 1/4 Yard Hot Pink Jersey Fabric
- Matching Thread
- Iron
- Thread clippers
- Sewing Clips
- Scissors
- Rotary Cutter, Cutting Mat, & Ruler
- Sewing Machine
- Tape Measure
Any fabric with a 4-way stretch is perfect for headbands. You want it to easily stretch over the head when it putting it on or taking it off. You will need about 1/4 yard of stretchy fabric, such as knit or spandex. Upcycling a t-shirt or leggings is a great idea. If you want to make several headbands, this beginner guide to buying fabric online and how to calculate fabric yardage is helpful. Once you have your fabric picked out, you only need a few basic sewing supplies. You’ll need some matching thread, some thread clippers for when you are finished sewing, some scissors, a sewing machine of course, and a tape measure. I like to use a Rotary Cutter, Cutting Mat, & Ruler to make my cuts easier and straighter.
How to Make a Knit Fabric Headband Without Elastic
Begin this how to make a knit fabric headband tutorial by cutting a single piece of fabric the full width of your fabric. Use a measuring tape to determine the length by measuring the wearer’s head. Then add 1/2″ inch for the seam allowance.

Now fold the fabric in half lengthwise with right sides together and pin to hold.

Now on this how to make a knit fabric headband tutorial, we will sew along the edge with a 1/4″ seam allowance.

Next, turn the tube of fabric right side out.

Next on this how to make a knit fabric headband tutorial, you will cut out a second piece of fabric 4″ long by 6″ wide.

Fold the longer edges under 1/4″ once, then twice, and pin.
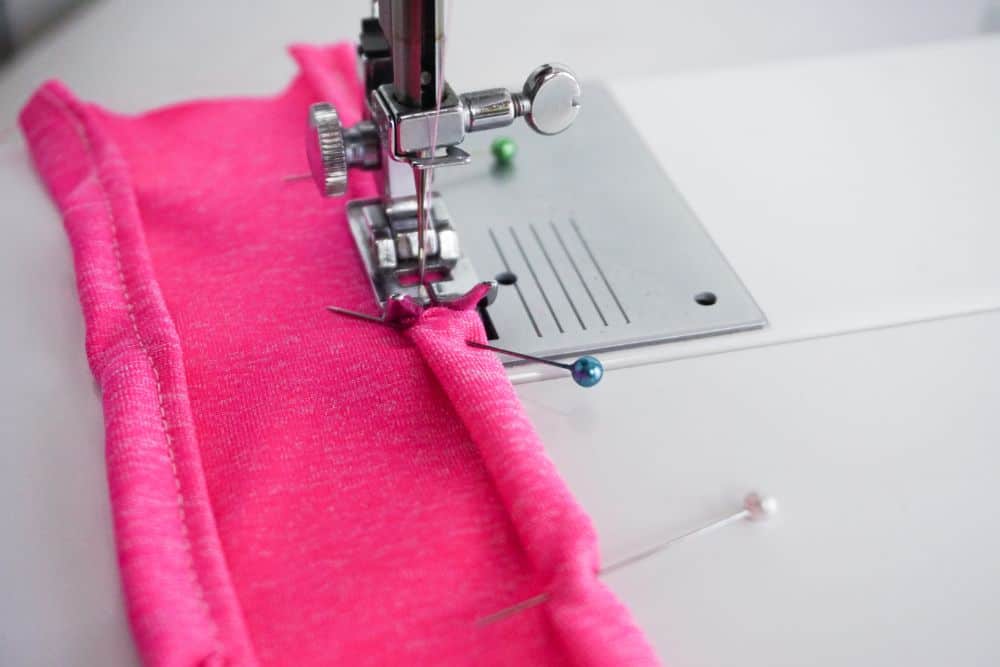
Now just sew along each edge with a 1/4″ seam allowance. We are about halfway through this how to make a knit fabric headband tutorial!

Now on this how to make a knit fabric headband tutorial, fold the smaller fabric piece in half width wise with right sides together. Sew to form a tube.

Slide the larger piece of fabric through the tube.

Next on this how to make a knit fabric headband tutorial, overlap the first fabric ends by 1/2″ and pin.

Next on this how to make a knit fabric headband tutorial, simple sew it in place with a 1/2″ seam allowance.

Now just simply slide the smaller loop over the seam, and fold all stitching under so it can not be seen.
For the last step in this how to make a knit fabric headband tutorial, it is recommended to tack down the smaller loop at the corners by hand stitching them. This will ensure the fabric ‘knot’ stays in place over the seam during use.

And that’s it! Now you know how to make a stretchy headband! To use, slide the headband over the head, then push it up and over the forehead. It is super easy to clean. Just toss it in the washer with your other laundry or hand wash it if you prefer. Don’t forget to pin this project for later, and check out more awesome sewing projects for beginners listed below.

If you like learning how to make a stretchy headband with knot, make sure to pin it to your favorite Pinterest board or share it with friends on social media. If you decide to make this simple project on your own, make certain that you take a picture afterward and tag us on social media as we love seeing the fabrics and color choices that people use!
Stretchy Headband with Knot

How to make a stretchy headband with knot from knit fabric. It's super easy and the perfect sewing project for beginners.
Materials
Instructions
- Measure head to determine length of fabric.
- Cut fabric full width of the fabric by length of head plus 1/2".
- Fold fabric in half lengthwise, right sides together.
- Pin.
- Sew with 1/4" seam allowance.
- Turn right side out.
- Cut another piece of fabric to 4" long by 6" wide.
- Fold long edges under 1/4" twice.
- Pin.
- Sew.
- Fold in half width wise with right sides together.
- Pin.
- Sew.
- Slide larger fabric through small tube.
- Fold larger piece making ends overlap by 1/2".
- Pin.
- Sew with 1/2" seam allowance.
- Slide small tube over seam.
- Fold seams under.
- Hand stitch to tack in place.
Notes
Fabric with 4-way stretch is best for this project.
Recommended Products
As an Amazon Associate and member of other affiliate programs, I earn from qualifying purchases.