
Sometimes called a soap saver, a bath mitt with soap pocket makes it easy to grasp even the smallest pieces of soap. It’s perfect for zero waste living and also a great assistive aid for people with limited grip strength. Follow this easy tutorial to sew your own.
Homemade Soap Saver for Zero Waste
Do you save all the last bits of bars of soap? Toss them in a homemade soap holder so they don’t go to waste. We have more ideas for zero waste sewing projects over here.
This bath mitt with soap pocket is exfoliating and perfect for all ages, but older folks and those with disabilities particularly appreciate it as a cleaning aid.
Use as an Assistive Aid
Reduced grip strength can make it difficult to hold on to a slippery bar of soap. Wearing a bath mitt with the soap secured in a pocket is welcome assistance for added dependence in the shower.
A homemade soap holder along with homemade soap would make a delightful gift too!
Supplies

This project requires a few small pieces of terry cloth. Old towels or wash cloths work great, or you can buy new. You will also need 3/8″ elastic, straight pins, fabric shears, and a marking pen.
How Do You Make a Bath Mitt?

Step 1 – Trace Hand
Begin by placing your hand (or someone else’s hand) flat on a piece of terry cloth with the hem at the bottom.
Loosely trace around the hand with about 1/2″ allowance. Draw a straight line from the tip of the thumb to the bottom edge.

Step 2 – Cut Out Terry Cloth
Cut out the mitt shape.
Then place it on top of another piece of terry cloth with the seam at the bottom and trace. A pin or two can help hold the layers steady.

Cut out the second mitt. You should now have two matching terry cloth hands.

Step 3 – Cut Out Pocket
Next, cut a 5″ x 5″ square with the original hem on one edge.
We are using a contrasting color for the pocket and thread to show better in this tutorial. You can choose the same color as your mitt or any other color you’d like.

Step 4 – Assemble Pocket
Place the pocket square 3″ from the bottom of one of the mitt cutouts, with the left edge extended 1/2″ over the side. The original hem of the pocket should be at the bottom. Pin to hold.

Step 5 – Sew Pocket
Now sew across the top of the pocket with a 1/4″ seam allowance.

Flip the pocket square up, over the seam you just made, and pin in place.

Beginning at the left edge, stitch across the bottom and up the right side where the fingers and thumb meet.

Step 6 – Assemble Mitts
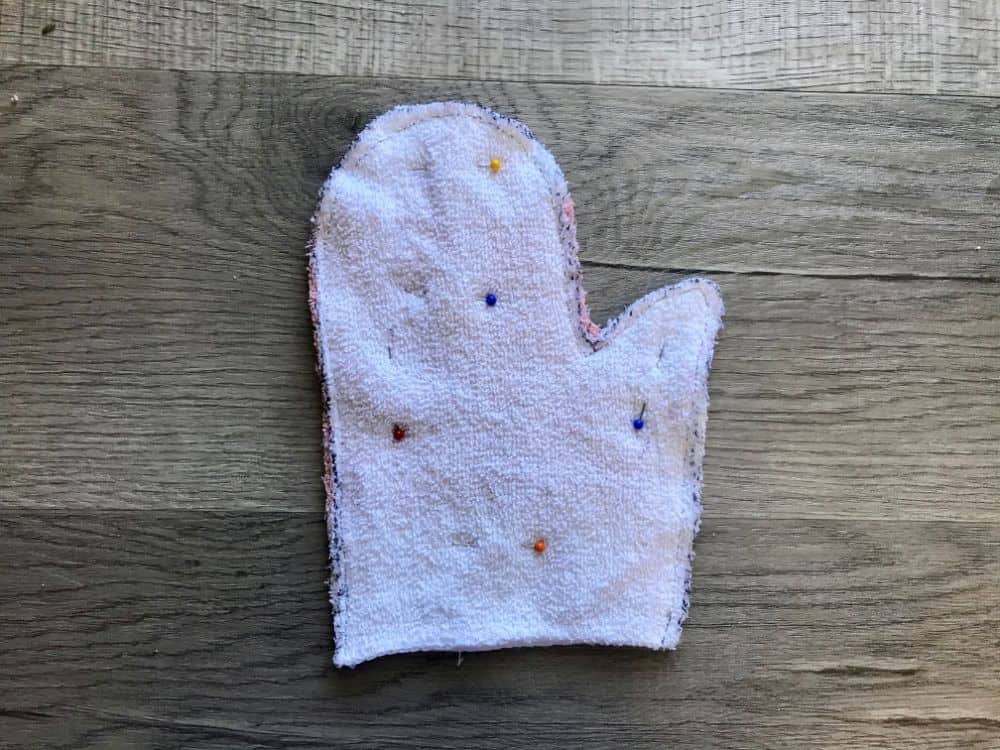
Now place the other mitt cutout on top of the pocket (right sides together) and pin.

Trim any excess pocket material that sticks out around the mitt.

Step 7 – Sew Mitt
Sew around the perimeter of the bath mitt with a 1/4″ seam allowance.
Almost done! Remove the pins to prepare for adding elastic.

Then draw a line across the mitt 1″ from the bottom on both sides.
Step 8 – Add Elastic

Cut the elastic to length by measuring it around your wrist if the bath mitt is for you. If it is for someone else, 8″ is a good average length for an adult.

Sew the elastic along the line while pulling it taught. If your machine has the capability to do a zig zag stitch, that is a good choice. A straight stitch will also work.
Be careful to only sew one layer of the mitt to the elastic! It’s a tight space, so go slow.

Overlap the ends of the elastic and sew back and forth a few times to secure.
Step 9 – Turn Right Side Out
Then turn the mitt right side out. You made a bath mitt with soap pocket!

Don’t forget to save this project for later, and check out some more sewing projects for beginners listed below.

Bath Mitt with Soap Pocket

Make a bath mitt with a soap pocket to easily grasp bars of soap. It works great for using bits of pieces of soap too for zero waste.
Materials
Instructions
- Place hand on wash cloth with a hem at the bottom.
- Trace around hand, drawing a straight line from the tip of the thumb to the bottom of the wash cloth.
- Cut out hand shape.
- Trace on another wash cloth.
- Cut out second hand shape.
- Cut 5" x 5" square for pocket.
- Place pocket square 3" from bottom of one hand with hem at bottom. Left side should extend over edge of mitt. Pin.
- Sew across top of pocket.
- Flip pocket up and pin.
- Sew along bottom of pocket and up to inside of thumb.
- Place remaining hand shape on top and pin.
- Trim any excess pocket sticking out between the layers.
- Sew around perimeter of pocket with 1/4" seam allowance.
- Draw a line 1" from bottom of mitt on both sides.
- Cut elastic to fit your wrist (or 8" for an average size).
- Sew elastic along the drawn line while pulling it taught.
- Overlap the ends and stitch several times to hold.
- Turn bath mitt right side out.
Notes
- A zig zag stitch is best for sewing the elastic.
- Be careful to only sew one layer of the mitt when sewing the elastic in place.
Recommended Products
As an Amazon Associate and member of other affiliate programs, I earn from qualifying purchases.
-
 Dritz 677-60 Disappearing Ink Marking Pen, Purple
 -
Grabbit Magnetic Sewing Pincushion with 50 Plastic Head Pins, Lime Green
-
Gingher 8-Inch Knife Edge Dressmaker's Shears
-
Mandala Crafts Flat Elastic Band, Braided Stretch Strap Cord Roll for Sewing and Crafting (3/8 Inch 10mm 50 Yards, White)
-
AmazonBasics Fade-Resistant Cotton Washcloths - Pack of 12, White


