Today on Beginner Sewing Projects, I’m going to show you How To Sew A Bandana! Bandanas are not only a great fashion statement, but they can also be useful for men, women, and kids! Bandanas can keep the sun off your neck while on a long hike, keep the sweat out of your eyes while working out, or they can just be worn as a fashionable hair accessory. Here we will go over the simple steps for making your own bandana. Sizes can be customized to fit men, women, or kids. While this is a great project for woven fabric, you can also use other fabrics such as stretchy cotton lycra.

As far as supplies, if you can use scrap fabric then this project can be made for pennies. You’ll need some matching thread, some scissors, and a measuring device. I recommend getting a rotary cutter, mat, and ruler as it makes putting your projects together a little easier. Let’s get started!

What You’ll Need:

- ¾ yard of fabric
- Thread
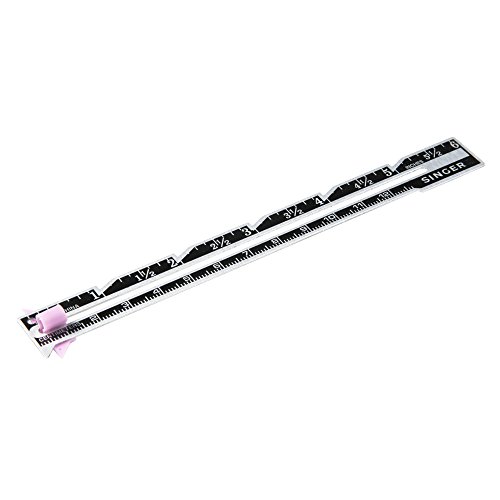
- Fabric Measuring Tape
- Thread Clippers
- Sewing Clips
- Scissors
- Pencil
- Rotary Cutter, Cutting Mat, & Ruler
- Sewing Machine
- Iron or heat press
- Glue Stick
How To Sew A Bandana

Step 1: Cut Fabric to Desired Bandana Size
The standard size bandana is about 22”. To create this standard size, the first step in this how to make a bandana sewing tutorial is to cut your fabric 23” long by 23” wide. Once you create the folded hem, it should work out to be about a 22” square.
If you want a smaller bandana for a child, you can cut the fabric 19” by 19”, or if you want a larger bandana it can be cut 28” by 28”. I am making a standard size, so I measured and cut 23” for the height and 23” for the width.
Step 2: Fold Sides and Press Twice

Next, you will fold each side down onto the wrong side of the fabric. Many people like to fold the standard ¼”, but if you want a thinner hem you can make the fold even smaller. As you are folding, press the fold down with the heated iron.

Once you have folded all four sides once, go over and fold a second time. Press the new fold with the heated iron. This second fold will give your edges a nice clean look.
Step 3: Pin, Clip, or Glue Around Edges

The next step on this easy sew bandana tutoral is to secure the edges before sewing. You will want to pin, clip, or glue the edges down so they do not come unfolded while sewing. If you glue the edges, you can use either a washable glue stick or a bottle glue with a thin-nosed dispenser. If gluing, put glue under the second edge and press down. If any glue is visible, it can be washed away after constructing the bandana. That’s what I did and it turned out great.
Step 4: Sew Around the Edges

Now it is time to sew! Head over to your sewing machine and, starting at one side of the bandana, sew the folded edges with a straight stitch.

To keep a continuous stitch, stop the sewing machine at each corner with the needle down in the fabric. Next, left up the foot, turn the bandana 90 degrees, and then bring down the foot. Continue sewing a straight stitch until the next corner and repeat until the last corner. When you get to the end, overlap the end stitch with the beginning stitch to secure.

And that’s it! Now you know how to make a bandana! Creating a bandana is that easy and it can be worn in so many ways! My girls like it as a headband, but it can also be worn to cover your neck from the sun or as a sweat catcher under a hat.

If you liked learning how to make a bandana, make sure to pin it to your favorite Pinterest board or share it with friends on social media. If you decide to make this simple project on your own, be certain that you take a picture afterward and tag us on social media as we love seeing the fabrics and color choices that people use!
How To Sew A Bandana

Sew this cute little bandana! Fun and easy sewing project with so many uses and ways to wear it!
Materials
Tools
Instructions
- Cut your fabric 23” long by 23” wide. Once you create the folded hem, it should work out to be about a 22” square.
- Next, you will fold each side down onto the wrong side of the fabric. As you are folding, press the fold down with the heated iron.
- Once you have folded all four sides once, go over and fold a second time. Press the new fold with the heated iron.
- Before sewing, you will want to pin, clip, or glue the edges down so they do not come unfolded while sewing.
- Start at one side of the bandana and sew the folded edges with a straight stitch.
- When you get to the end, overlap the end stitch with the beginning stitch to secure.
- Enjoy
Recommended Products
As an Amazon Associate and member of other affiliate programs, I earn from qualifying purchases.
-
 Fiskars Crafts 95237097J Rotary Sewing Cutting Set (3 Piece), Grey
 -
100PCS Sewing Clips for Quilting, Multipurpose Sewing Clips Clamps,Accessories Colors Wonder Clips,Perfect for Sew Binding,Crafts,Paper Work and Hanging Little Things
-
SINGER 00220 Sewing Gauge, 6-Inch
-
LIVINGO Premium Tailor Scissors Heavy Duty Multi-Purpose Titanium Coating Forged Stainless Steel Sewing Fabric Leather Dressmaking Softgrip Shears Professional Crafting (9.5 INCH)