
A new school year is just around the corner! If your children are anything like mine then pouches are a must! I love how quick and simple you can make these fun zipper pouches and you can too! I will walk you through all the steps needed in How To Make A Zipper Pouch The Easy Way! Whether you send your kids to school, homeschool your kids, are a teacher, or just love pouches like me, you are going to LOVE this tutorial! One of the many reasons I love zippered pouches is definitely going to be how versatile they can be! You can use them to store office supplies, make-up, little toys, feminine products, and so much more. You can keep everything tidy and organized in your home just by using these fun pouches. They are also great for little snacks too! I love to make a couple and keep them in my purse for those just in case moments my kids might have. I even pack some first aid supplies in them and toss it in the car. They are so simple to sew that they even make great gifts for your friends and family. Get ready to gather your supplies and jump right in!

When picking fabrics, think about how you might want to use your Zipper Pouch. Some fabrics can not get washed in the washing mashing at home just in case they get dirty. There are so many color and pattern choices when making sewing projects at home. This is such a fun and simple beginner project for sure!

What You’ll Need:

- 1 Yard of fabric (if you want an off set color you can pick another yard for the inside)
- Zipper (in the width that you would like the bag to be. Here I am using a 12 inch zipper)
- Matching Thread
- Zipper Sewing Foot
- Scissors
- Rotary Cutter, Cutting Mat, & Ruler
- Iron or heat press
- Thread Clippers
- Sewing Clips
How To Make A Zipper Pouch The Easy Way

First on this how to sew a zipper pouch the easy way sewing tutorial, you are going to cut the main zipper pouch fabric 1 inch longer than your zipper in width. If you are working with a 12-inch zipper, then cut the fabric 13 inches across. The length can be as long as you like just as long as the bag is the length of your zipper plus one inch. You can make them as deep as you want. I made the pouches pretty deep. Cut two pieces for the outside fabric and two pieces for the inside fabric. They can be matching like mine here or you can do different colors or styles.

Place one lining piece right side up. Place the zipper on top with the zip end right side up with the zipper hand to the left. Place a piece of the outside fabric on top of it, lining up with the top of the zipper right side down. Add clips to the top where the zipper is sandwiched between the 2 layers so it does not move around on you.

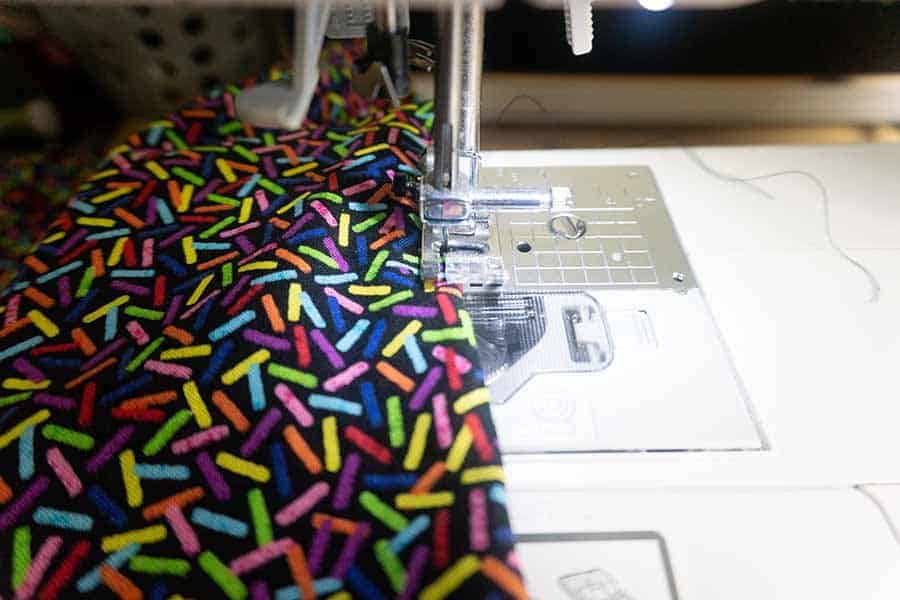
Now on this easy zipper pouch sewing tutorial, it’s time to head over to the sewing machine. Swap over to your zipper sewing foot to make sewing on the zipper nice and easy.

Now you are going to lay down another lining piece right side up. Place the piece you just sewed with the zipper face up to and handle to the right side with the right side of the outer fabric facing up. Line another outer piece up with the top of the zipper right side down. Stitch across using the zipper foot. You will now have fabric sewn on each side of the zipper.

Layout fabric with the right side up and press.

Stitch along the zipper on each side. Pressing this down in the step above help the fabrics to move smoothly along the sewing machine.

Now on this easy zipper pouch sewing tutorial, we will add the lining to our pouch. Place the lining fabric right sides together with the outer fabric. Make sure your zipper is open halfway so you will be able to flip this. If you don’t have the zipper open you won’t be able to flip the pouch right side out.

Lay flat and make sure the zipper is flush when you clip. The way the zipper feels natural to go is best. Stitch all the way around the bag except for a two-inch gap on the liner side bottom. Leave this open to turn the pouch.

Now you are going to turn the bag right side in and then pull out the liner. Press the fabric. Make sure to tuck the raw edges of the hole you left back in.
Run a topstitch around your zipper pouch to close the hole you left for turning.

For the last step on this fun zipper pouch tutorial, place the liner into the outer part of the zipper pouch and now you’re ready to use your zipper pencil or pen pouch! What a quick and easy beginner sewing project we had for today! I hope you had fun learning how to make a zipper pouch the easy way. I bet you won’t want to learn how to make zipper pouches any other way. This is a great little tutorial for younger pre-teens to learn how to make. I remember teaching my daughter how to make her first zipper pouch and it was such a fun time together. She has a love for sewing just like me and I could not be prouder. It is never too early to learn something new and then to teach others to do the same. I can’t way to see what all you have made today. Make sure to share with us!

If you liked learning how to make a zipper pouch the easy way, make sure to pin it to your favorite Pinterest board or share it with friends on social media. If you decide to make this simple project on your own, make certain that you take a picture afterward and tag us on social media as we love seeing the fabrics and color choices that people use!
How To Make A Zipper Pouch The Easy Way

Keep your pens and pencils organized with this quick and easy sewing project. Perfect for beginners or learn an easier way to sew a zipper pouch!
Materials
Tools
Instructions
- Cut the zipper pouch fabric 1 inch longer than your zipper in width.
- Cut two pieces for the outside fabric and two pieces for the inside fabric. They can be matching like mine here or you can do different colors or styles.
- Place one lining piece right side up. Place the zipper on top with the zip end right side up with the zipper hand to the left. Place a piece of the outside fabric on top lining up with the top of the zipper right side down.
- Sew across with the zipper foot.
- Lay down another lining piece right side up. Place the piece you just sewed with the zipper face up to and handle to the right side with the right side of the outer fabric facing up. Line another outer piece up with the top of the zipper right side down.
- Stitch across using the zipper foot.
- Lay out fabric with the right side up and press.
- Stitch along the zipper on each side.
- Pull up and place the right sides of outer fabric together and with right sides of the liner fabric together. Make sure your zipper is open halfway so you will be able to flip this.
- Lay flat and make sure the zipper is flush when you clip.
- Stitch all the way around the bag except for a two-inch gap on the liner side bottom. Leave this open to turn the bag.
- Turn the bag right side in and then pull out the liner.
- Press. And topstitch the hole closed.
- Place the liner into the outer part of the zipper pouch and now you’re ready to use your zipper pencil or pen pouch!
Recommended Products
As an Amazon Associate and member of other affiliate programs, I earn from qualifying purchases.
-
 LIVINGO Premium Tailor Scissors Heavy Duty Multi-Purpose Titanium Coating Forged Stainless Steel Sewing Fabric Leather Dressmaking Softgrip Shears Professional Crafting (9.5 INCH)
 -
Meillia 6PCS 60 Inch #3 Double Slider Zippers Closed End Nylon Coil Zippers for Sewing, Crafts, Bags, Pillowcases, Bed Sacks, Decorating (60" 6 Colors)
-
100PCS Sewing Clips for Quilting, Multipurpose Sewing Clips Clamps,Accessories Colors Wonder Clips,Perfect for Sew Binding,Crafts,Paper Work and Hanging Little Things
-
Brother Sewing Machine, XM2701, Lightweight Machine with 27 Stitches, 6 Included Sewing Feet


