This is the cutest toy to give as a baby shower gift! We show you how to make this Large Baby Block Rattle! The included baby rattle sewing pattern is easy to sew for beginners. A full step by step tutorial with photos are included below. Baby blocks or cube toys encourage babies to crawl and explore in a gentle way. Inserting jingle bells into the cube turns it into a soft rattle that grown-ups will enjoy too.

Adding ribbon tags to the seams of the block gives the cube more texture and provides something for baby to grasp. This baby block tutorial is in celebration of 80 years of Poly-fil with Fairfield World. Poly-fil is a premium polyester filling that is washable, hypoallergenic and made from recycled materials. Gather up your materials below and let’s get started!
Supplies

- Flannel Fabric or Receiving Blankets
- Interfacing
- Poly-fil Fiber Fill
- Jingle Bells
- Ribbon (Optional)
- Sewing Clips
- Rotary Cutting Set
- Turning Tool
- Coordinating Thread
- Hand Sewing Needle
- Iron
- Sewing Machine
Choose soft fabrics like flannel or flannelette that are gentle for baby’s skin. One way to get a variety of coordinating prints at an affordable price is to up-cycle a collection of receiving blankets. Alternatively, you can purchase flannel fabric by the yard and make a super easy flannel baby blanket to make the block rattle toy. Interfacing is used to give the block more structure, and it is stuffed with Poly-fil.
Jingle bells are used to give the rattle a gentle sound when the block is moved. Rattle inserts can be used to give the toy a sound of chimes, if you prefer. Grab some ribbon in varying colors and textures if you would like to insert tags into the block.
Tutorial
Before you begin this Large Baby Block Rattle Sewing Tutorial, I always like to prepare my fabric by washing, drying and ironing it. This process acts as a preshrink so that your stitches don’t pull out later and ironing your fabric makes it easier to cut!
Step 1 – Cut Fabric
Use the rotary cutter, cutting mat and acrylic ruler to cut your fabric into 10″ squares. You will need 6 squares total. They can all be cut from the same fabric or mixed and matched.

Step 2 – Cut Interfacing
Next, cut the interfacing into 6 squares measuring 9.5″ each.

Step 3 – Iron Interfacing
Now on this large baby block rattle sewing tutorial, we will iron the interfacing to our fabric. Follow your interfacing instructions to fuse it to the center of each fabric square, on the wrong side. Typically, you will cover the interfacing with a damp cloth. Then press with a steam iron for 15 seconds. Lift and repeat until the interfacing is fused to the fabric.

Step 4 – Continue Interfacing
Continue pressing interfacing onto each fabric square until all six are completed.

Step 5 – Layout
Next on this large baby block rattle sewing tutorial, lay the squares out on a flat surface with three across and four down, meeting in the center like a cross. If you are using multiple fabrics, make sure you like how they are placed. The square in the center will become the bottom of the block, and the square at the bottom will become the top.

Step 6 – Add Ribbon Tags
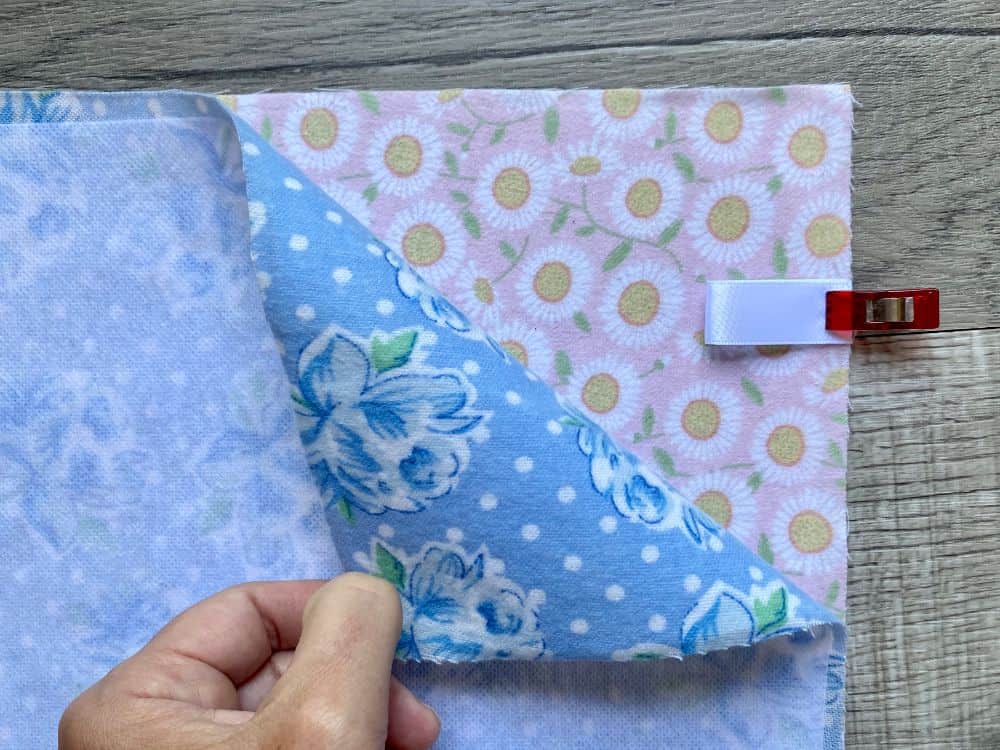
To add ribbon tags to your large baby block rattle (optional), cut 3″ lengths of ribbon. Fold the ribbon into a loop, and clip it to the right side of the center fabric square with the loop facing toward the middle.
Step 7 – Assembly
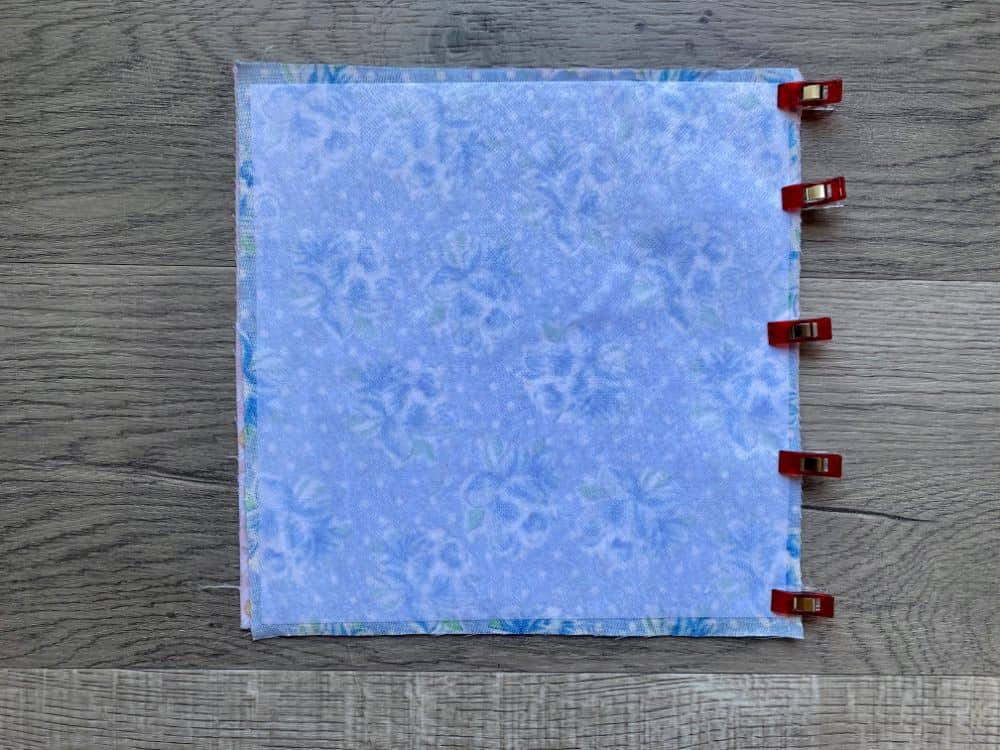
Fold a square adjacent to the center square onto the center square with right sides together. Clip the side where the squares touch in the layout.
Step 8 – Sew
Now on this large baby block rattle sewing tutorial, it’s time to put it all together! To sew the squares together, begin stitching 1/4″ from the corner with a 1/4″ seam allowance. Sew down the side, stop 1/4″ before reaching the next corner.

Step 9 – Open and Press
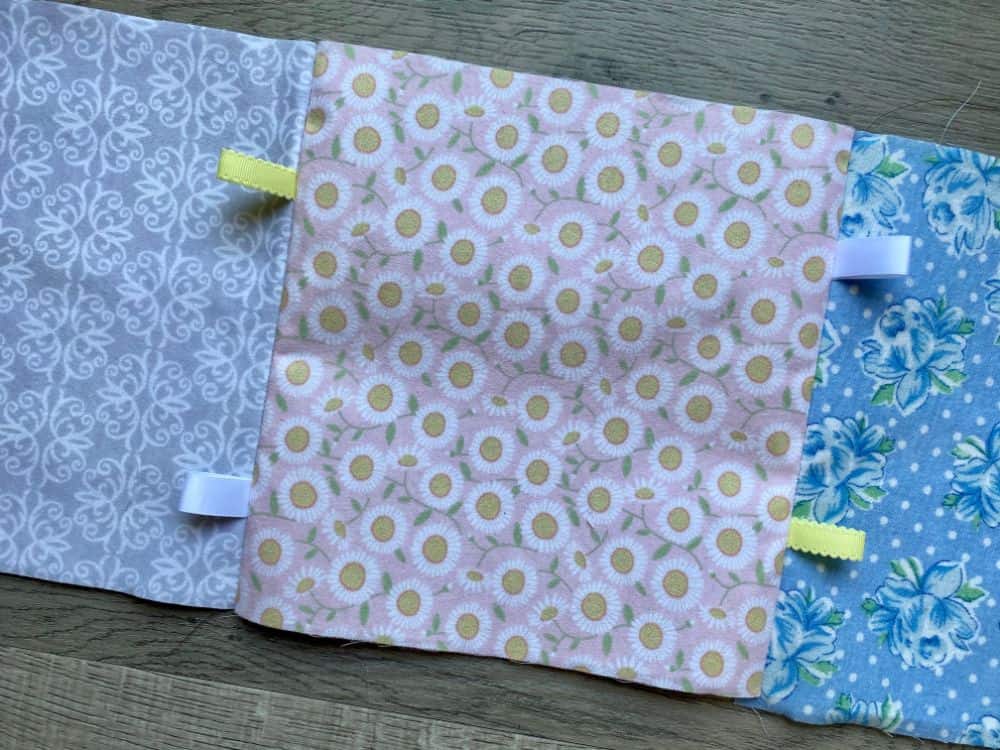
Open the seam you just created to reveal the ribbon tags. Press the seam open.

Step 10 – Build the Block
Next, repeat steps 6-9 for the block on the opposite side of the center block.

Step 11
At this point in this large baby block rattle tutorial, you should have three squares across with ribbon tags in between them, if you choose.
Step 12
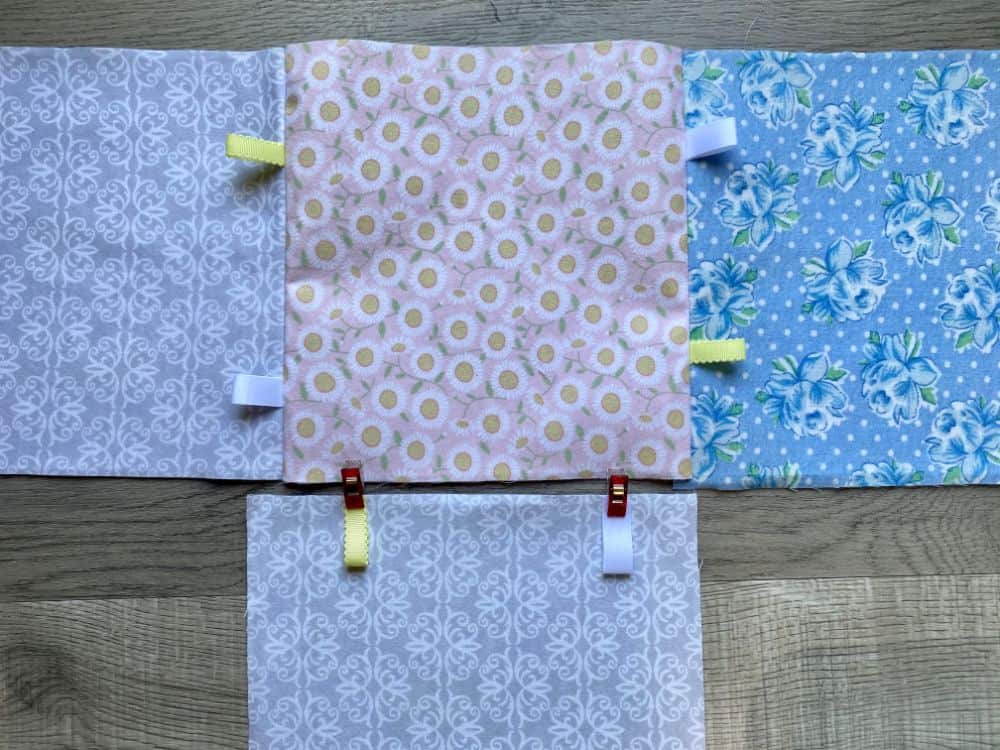
Continue building the baby block rattle by adding the squares below center.
Step 13
Sew the bottom two squares together where they meet. Then fold the squares up to meet the center squares with right sides together.

Step 14
Remember to start and stop sewing 1/4″ from every edge!

Step 15
Continue to add loops of ribbon between the squares as desired.

Step 16
Now on this large baby block rattle sewing tutorial, fold the top square onto the center square with right sides together and sew.

Step 17
Your cross layout of squares for the large baby block rattle should all be sewn together now.
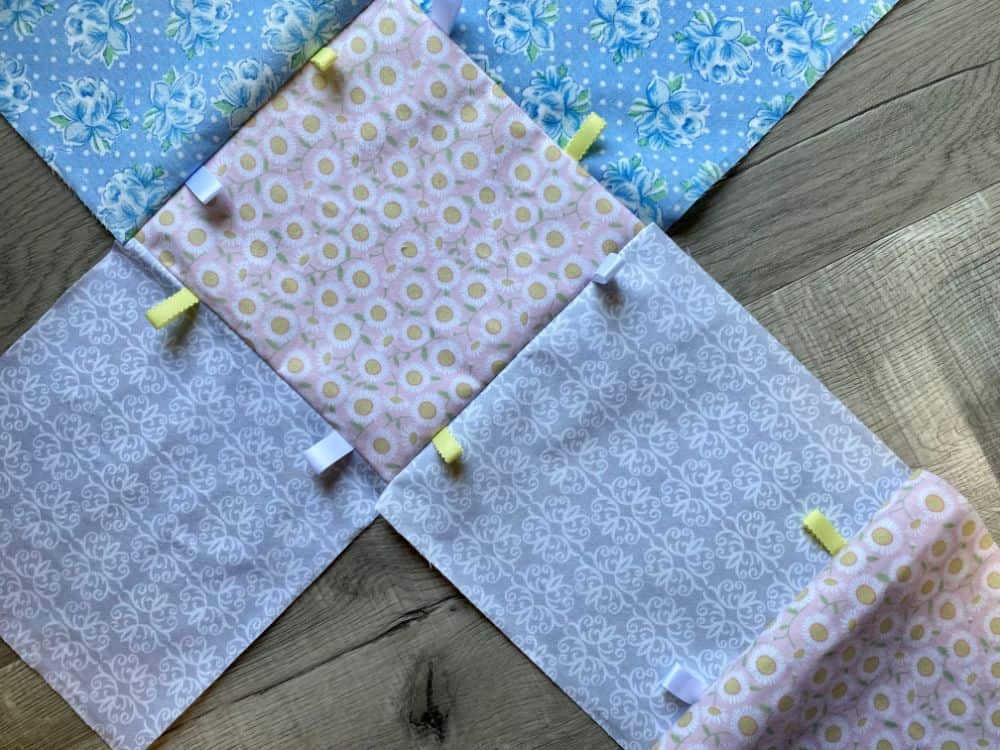
Step 18
To make our large baby block rattle take shape, start by folding each square up to the meet the closest edge of the center square, right sides together. Do this one at a time and sew, still starting and stopping 1/4″ from each edge.
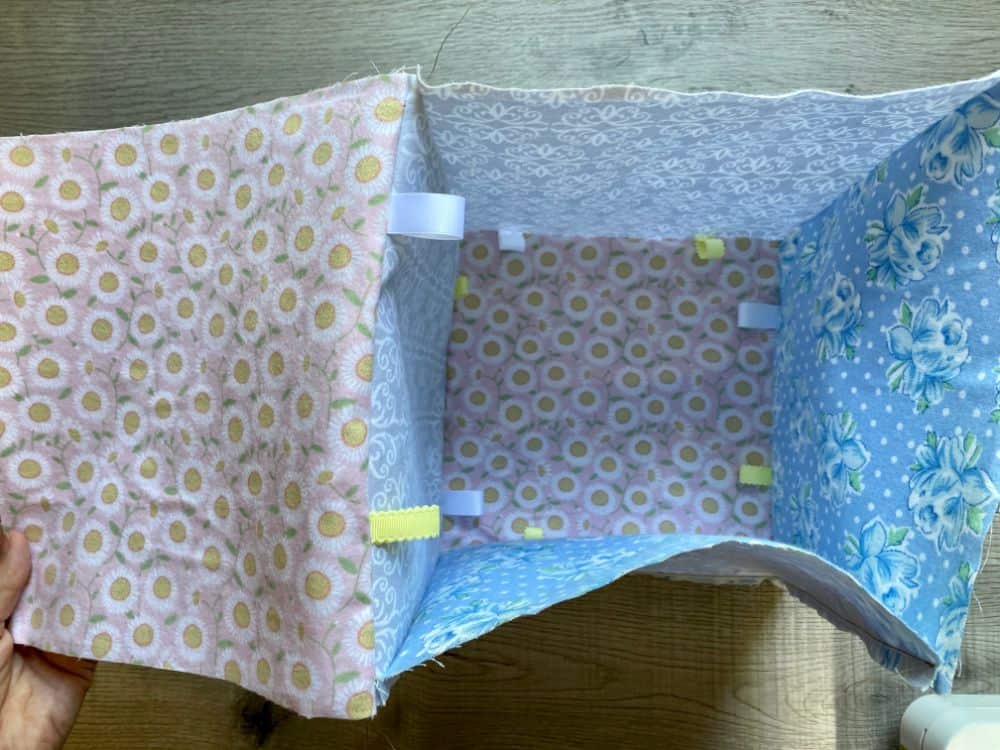
Step 19
Fold the remaining square over the top of the block and clip it in place.

Step 20
Sew around the square leaving a 3″ opening on one side.

Step 21 – Trim Corners
Next on this large baby block rattle sewing tutorial, trim each corner to reduce bulk in the seams. Make sure you do not cut through your stitches.

Step 22 – Turning
Reach inside the block, and pull it through the opening to turn it right side out.
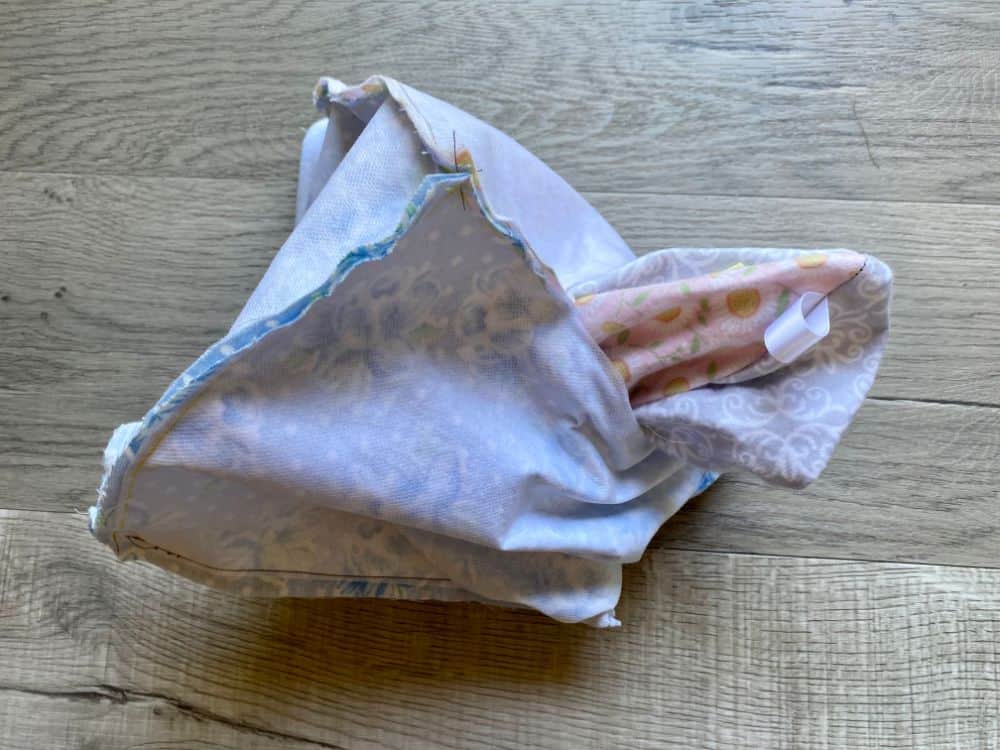
Step 23
Use a turning tool to gentle press out the corners. Take care not to press through the fabric.

Step 24 – Stuff
Next on this large baby block rattle sewing tutorial, it is time to the stuff the block with Poly-fil. Press the filling into each corner with the tool provided. Then stuff the middle.

Step 25 – Add Sound
If you would like your baby block to rattle, add a handful of bells in the center of the block. Then continue filling the block with Poly-fil.
Keep in mind that surrounding the bells with Poly-fil will muffle the sound. Stop and test the sound to adjust the number of bells you prefer.

Step 26 – Closing
For the final step in this large baby block rattle sewing tutorial, we just need to close the opening. Once the block is stuffed to your liking, use a needle and thread to hand stitch the opening closed with an invisible stitch or ladder stitch.
If you need help with hand stitching, check out our guide on How to Sew Common Stitches by Hand.

And that’s it! Your large baby block rattle is complete!
Care
The baby block can be spot cleaned or laundered as needed. The fabric and Poly-fil are both washable.

Don’t forget to pin this project for later, and check out some more sewing projects for beginners listed below.

Large Baby Block Rattle

How to make a large baby block rattle toy with step by step instructions. This is an easy sewing project that encourages baby to crawl and explore.
Materials
Tools
Instructions
- Cut six 10" squares of fabric
- Cut six 9.5" squares of interfacing
- Fuse interfacing to center of each square on wrong side
- Lay squares out on a flat surface in a cross design (3 across, 4 down)
- Cut ribbon to 3" lengths
- Fold ribbon in loop and clip to edge of center square
- Place square to right of center on top of center, right sides together
- Clip to hold
- Sew down edge with 1/4" seam allowance, starting and stopping 1/4" from each corner
- Open and press seam
- Repeat for square to the left of center
- Add squares to the bottom and top of center using steps 7-10
- Pull each square up to the meet the center square and sew to form the block shape
- When adding the final square to the top, clip in place before sewing and leave a 3" opening
- Trim corners
- Turn block right side out
- Stuff with Poly-fil
- Add jingle bells inside stuffing
- Use an invisible stitch to close the opening
Notes
The ribbon tags are optional. You can also choose from a variety of sound makers instead of using jingle bells.
Recommended Products
As an Amazon Associate and member of other affiliate programs, I earn from qualifying purchases.
-
CLOVER 7803 Point 2 Point Turner
-
Rotary Cutter Set Turquoise - Quilting Kit incl. 45mm Rotary Cutter, 5 Replacement Blades, A2 Cutting Mat, Acrylic Ruler and Craft Clips - Ideal for Crafting, Sewing, Patchworking, Crochet & Knitting
-
Jingle Christmas Bells, 300 Pieces Craft Bells, DIY Bells for Wreath, Holiday Home and Christmas Decoration (Silver, 0.5 inch)
-
Fairfield Poly Fil Premium Fiber Fill, 32-Ounce
-
Pellon 950F ShirTailor15" x 3 Yards
-
Luvable Friends Unisex Baby Cotton Flannel Receiving Blankets Bundle, Basic Elephant, One Size


