
We’ve all been there: found that would-be-perfect dress for a big event, only to find that it either A. doesn’t come in our size, or B. just doesn’t sit right on our body. This is not just a problem that occurs with dresses either, it happens with all sorts of garments!
But let’s face it, no two bodies are the same, and a garment that may perfectly flatter one figure can easily be unflattering to another.
This is where the magic of sewing comes in… You don’t need to be an expert seamstress to get your clothing to fit just how you want it.
In fact, most basic alteration skills can be adapted to suit a variety of garments, and were going to show you three easy ones below.
1. Add a Side Panel
Adding side panels to a shirt is an easy way to make it bigger, while at the same time adding a touch of personality to your wardrobe.
Side panels work great for tops that are a little too snug around the waist, but otherwise fit comfortably across the chest, shoulders and arms.
Adding a side panel will slightly change the shape of your garment, giving it a ‘swing’ or ‘smock’ look. Side panels can also be added to trousers, jeans and skirts to expand the waistline.
You’ll Need:
- Fabric Pins
- Fabric scissors
- Ruler
- Fabric for side panels (around 1m depending on your T-Shirt size)
- Fabric chalk
- Sewing machine and thread
Method:
Start with your T Shirt inside out and find where the sleeve seam connects with the side T shirt seam. Measure 1.5cm away from this point and mark with a pin.
Measure from the outer edge of your T shirt inwards around 1 inch and mark with fabric chalk. Use a ruler to draw a straight line with your fabric chalk over the marking, starting from the pin you placed earlier to the bottom of the T shirt.
Starting from the bottom of the T-Shirt, cut upwards along the line. For a neater cut, you can use a fabric cutter against the side of a ruler. Do this on both sides of the T-Shirt.

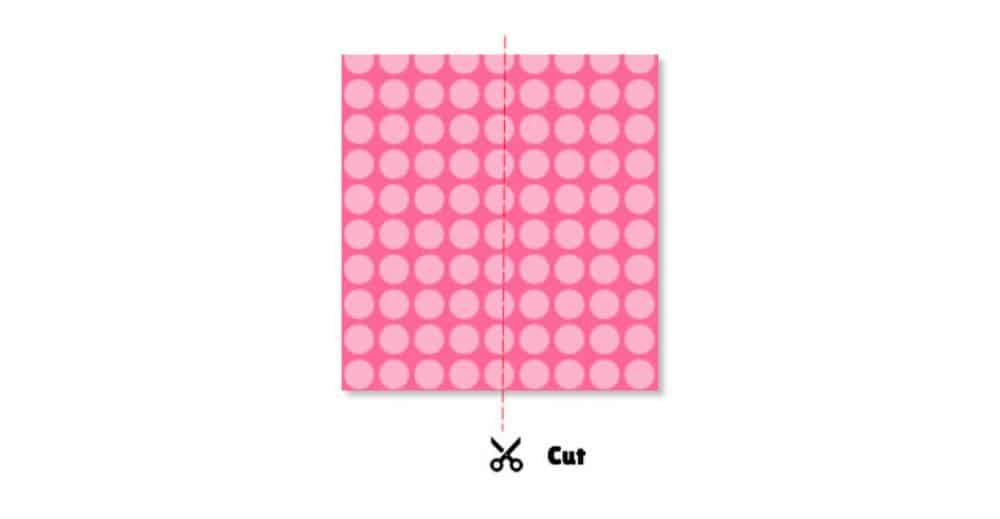
Take one of pieces of fabric you just cut out of your T Shirt and place it on the right side of your chosen panel fabric. Pin it down and fold the fabric wrong side to wrong side.
Cut the panel fabric using the piece you cut from your shirt as a template. Add 1 inch at the top and sides and two inches at the bottom of your pinned fabric piece for seam allowance.

Unpin the fabric piece and unfold the panel fabric. Cut it directly down the middle. Now you have your two pieces of panel fabric. These should be the same size.
Hem the two short sides of your panel fabric (fold upwards right side to wrong side, pin and straight stitch).

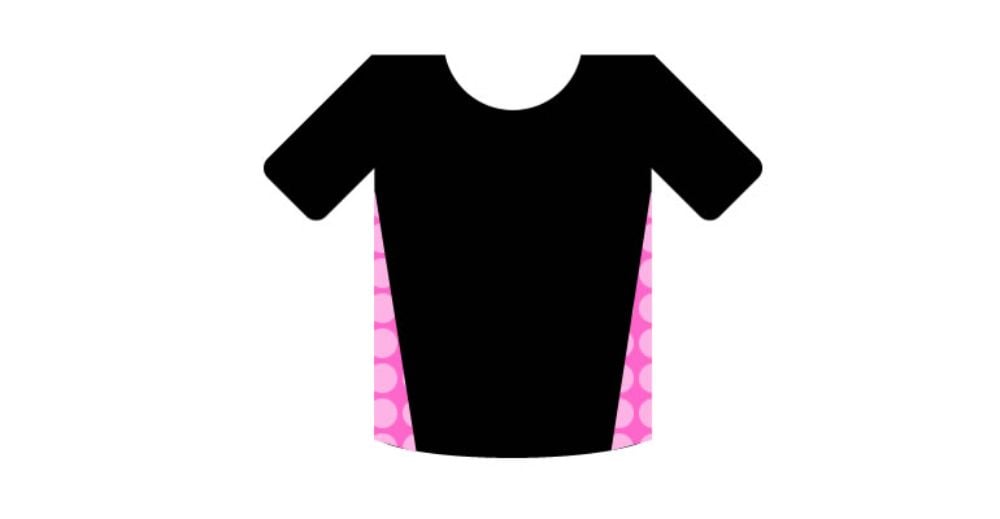
Line your panel fabric right side down with the cut edge of your T shirt. Pin together. Do this for both sides of the T shirt.
Turn the T shirt inside out and pin the other side of the panel fabric to the opposite cut edge of the T shirt.
Pin the top of the rectangle to the top and bottom of the cut edge.
Zig-zag stitch the fabric to the T shirt where you have pinned it.

Your new re-styled shirt is now complete!
2. Add Sleeves
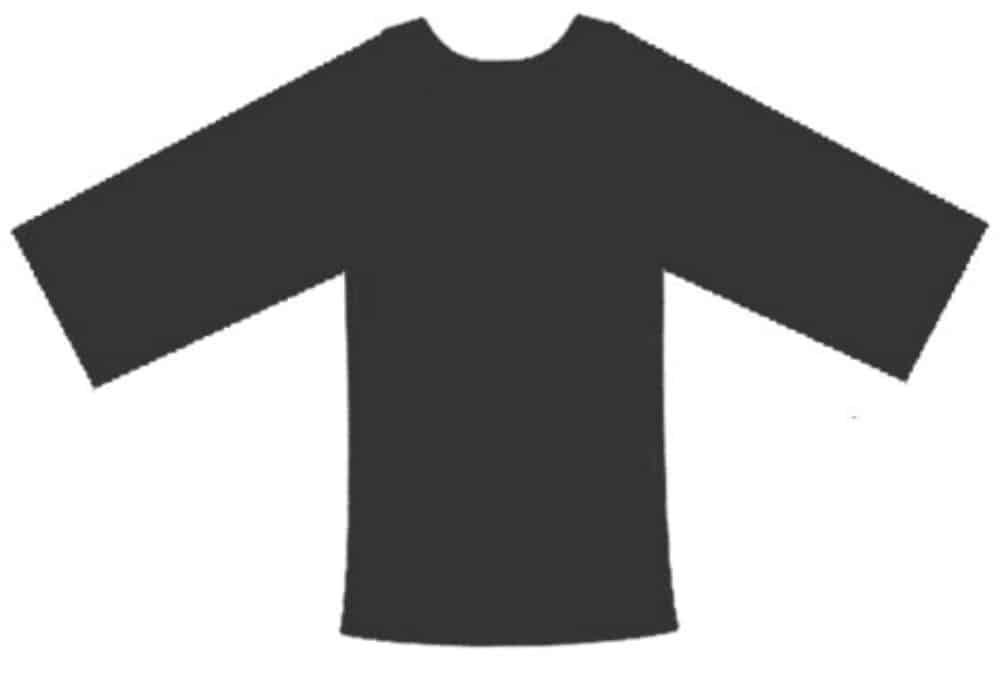
Many of us are self conscious about our arms, which can make clothes shopping difficult during the warmer seasons, but once you know how to add on sleeves to a dress or top, your options will no longer be limited.
There are various styles of sleeve that can be added to dresses and tops including flutter sleeves, box sleeves, cap sleeves and more. Below we show you how to add a simple short sleeve to a sleeveless dress.
You’ll Need:
- Fabric pins
- Fabric for sleeves
- Sewing machine
- Fabric scissors
- Ruler
We recommend choosing a fabric that’s either an identical or very close match to your tops/dresses colour, or a colour/pattern with an obvious contrast. Anything in the middle will make the alteration obvious.
To get the right size sleeve, start by taking a measurement when you are wearing your dress/top. Take the measurement from the armhole to where you would like the sleeve to sit on your arm.
Next, place your sleeveless garment on a piece of parchment paper. Draw an outline around the armhole from the shoulder to the armpit.
Starting at the shoulder where your line ends, draw a line extending outwards in the opposite direction to the shoulder. The line should be the same length as the measurement you took earlier.
Do the same from the armpit. Connect each line together so you have a solid template.

Draw around the entire template adding a 1 ½ and inch seam allowance.

Cut out your pattern and line it up with the folded edge of your chosen fabric. Cut out the pattern and repeat once.

Open out the fabric and fold up the bottom edge. Straight stitch along the fold.

Fold the fabric pieces right side to right side and sew the two longest open edges with a straight stitch.

Turn your sleeveless garment inside out and pin the edge of the sleeve to the armhole. Make sure that your sleeve is right side out when you do this!

Sew the sleeve to the armhole with a straight stitch taking care to backstitch at the beginning and end.
Secure with a zigzag stitch over the straight stitches.
You now have sleeves!
3. Make an Over Sized Top or Dress Fit
This is a great alteration to try if you’ve recently lost weight or you’re looking to take in a top that’s just slightly too big. This alteration works best on fabrics that have a little bit of stretch to them such as jersey or polyester fabric.
Begin by turning your dress/top inside out and putting it on. Pinch each side with your finger to see how fitted you would like it to be and secure in place with some fabric pins. Use a ruler to take a measurement.
Take off the dress/top and turn it inside-out. Use a washable marker/fabric chalk to mark your measurement.
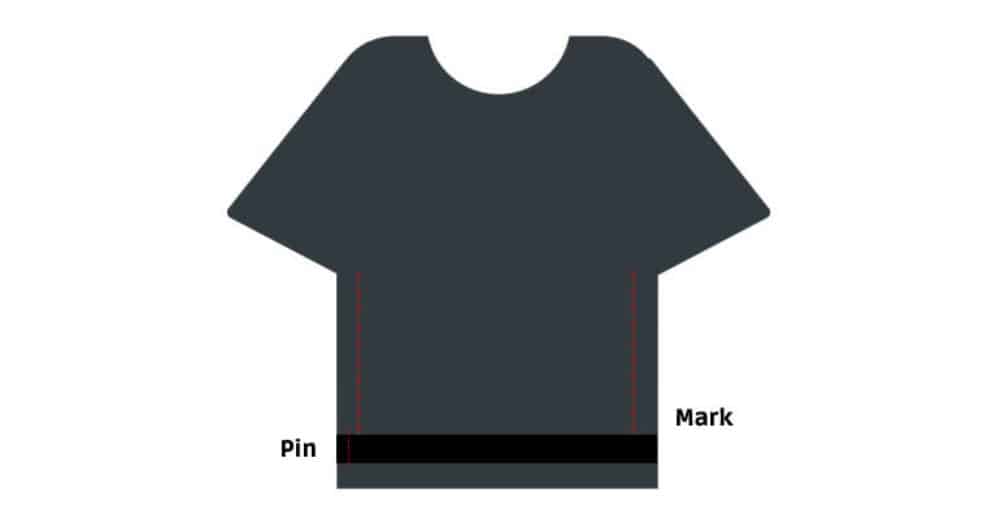
If you have a waistband. Make sure the front and back line up evenly. Secure in place with a pin before you stitch. If you fail to do this step the alteration will look obvious.
Mark a straight line from the top of your armhole to the waistline. Straight stitch along this line using a sewing machine. Take care to backstitch at the beginning and end of the stitch.
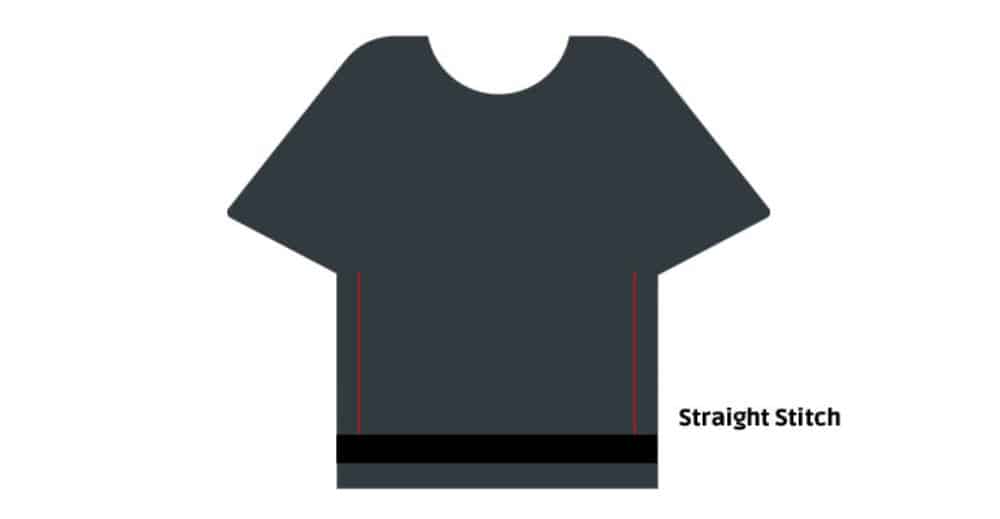
Turn your T shirt inside out and enjoy your new, closer fit!

Don’t forget to pin this project for later, and check out more sewing tips and techniques for beginners listed below.


