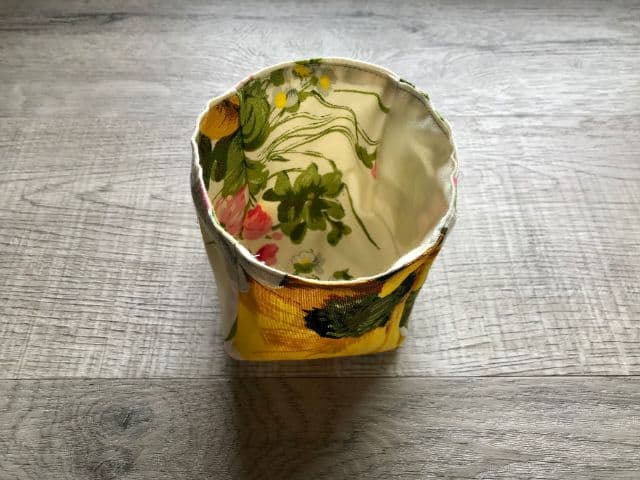
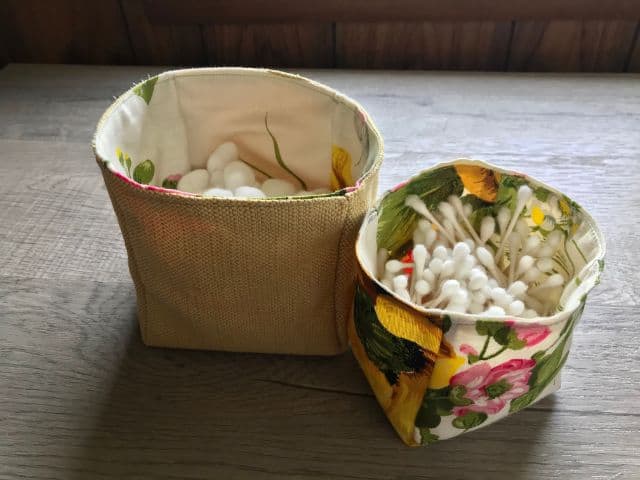
If you’re like me, you can never have enough organization in your home. That’s why today we are bringing you this Easy Fabric Basket Tutorial! Organize all the things! All sewing levels love making them because they come together quickly and are truly useful all around the house. You can easily adjust the pattern to make baskets in any size. The small bins are perfect for making surfaces look less cluttered. Larger baskets are great for organizing closets. I made some of these smaller fabric baskets for organizing my bathroom counter. Now I have a cute and neat place to store my cotton balls, q-tips, and other small items without them taking up my precious drawer space. This sewing tutorial is straight-forward and easy to follow. You’ll be sewing your own cute baskets in no time.

My favorite use is keeping one next to the couch to hold things I’m constantly reaching for but can’t seem to find – lip balm, lotion, a pen, the remote control, etc. They are also wonderful for holding reusable makeup remover pads. That is another beginner-friendly sewing project you might want to try.
Don’t forget to make extras to include in care packages for loved ones.
Supplies Needed Easy Fabric Basket Tutorial
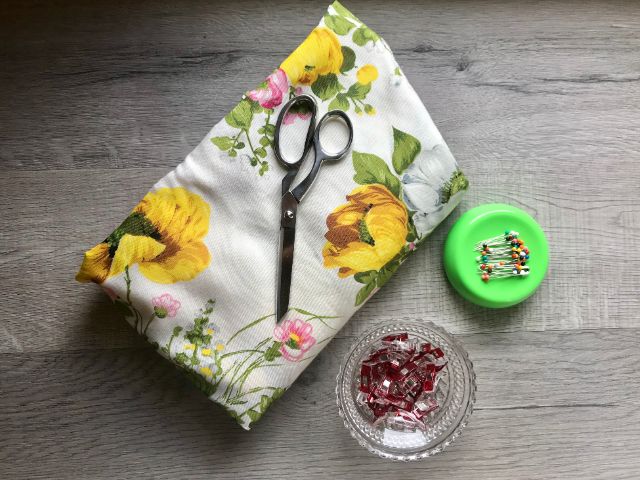
- 1/4 yard Heavy Fabric
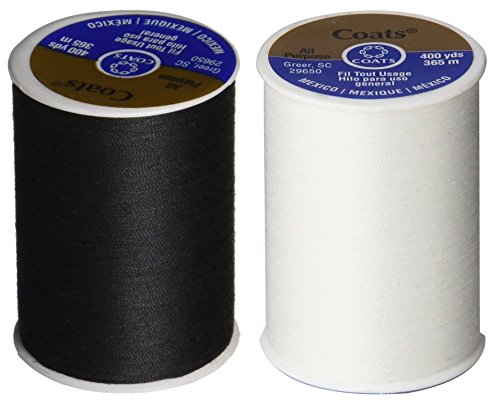
- Coordinating Thread
- Fabric Shears
- Straight Pins
- Sewing Clips
- Iron
- Ironing Board
- Sewing Machine
A heavy, durable fabric is best for your basket. This example uses vintage broadcloth. Canvas, denim and even felt will work.
If you need help choosing fabric for any project, this Beginner Guide to Buying Fabric is a fantastic resource. The amount needed will depend on the size of your basket(s).
You will also need the following basic sewing supplies, in addition to an iron, ironing board and sewing machine.
How to Make a Fabric Basket
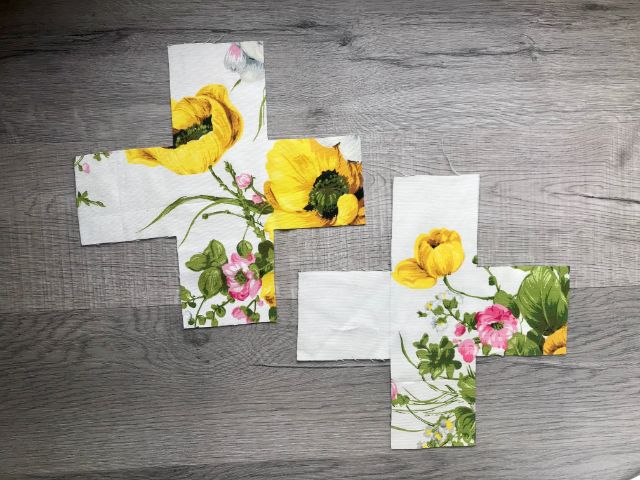
Begin this easy fabric basket tutorial by determining the size of your basket. They can be made in any size divisible by three. This tutorial makes the basket shown holding toilet paper and began with two 15″ x 15″ squares of fabric. Dividing by three gives you the amount to cut from each corner, forming a plus shape. In this case, 15 divided by 3 equals 5. Therefore, 5″ squares were cut from each corner of the 15″ squares of fabric. One of these will form the lining, and the other will form the exterior of the basket. They do not have to be cut from the same fabric. It’s fun to mix and match!
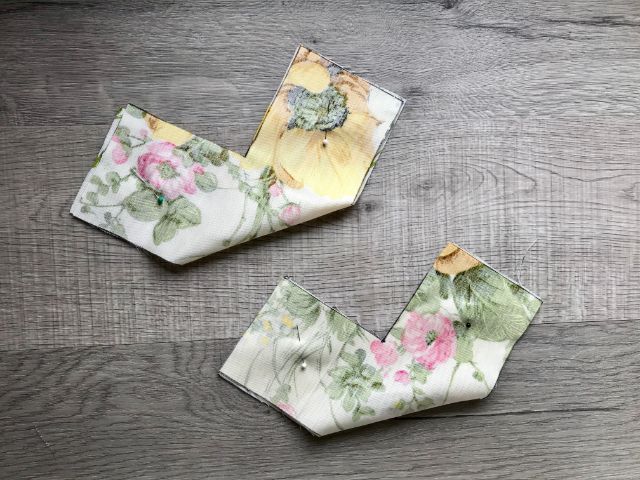
Next, fold each piece of fabric with right sides together and pin. Sew along each side with a 1/4″ seam allowance. Do not sew across the top or into the center ‘V’.
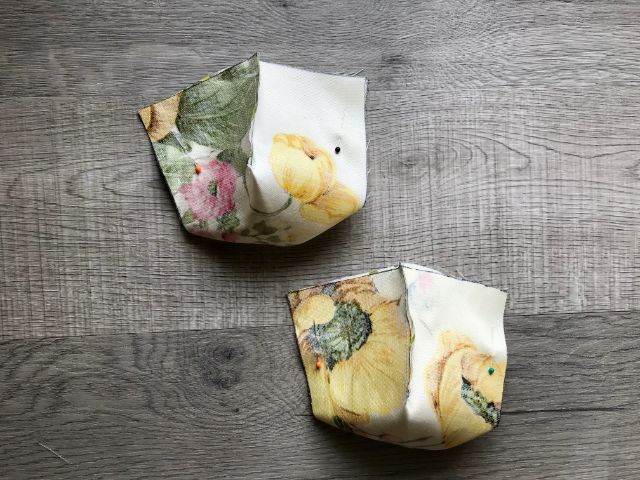
Then fold the fabric to the opposite corners, still with right sides together and pin. You should begin to see a box shape forming. Sew along the remaining sides with a 1/4″ seam allowance.
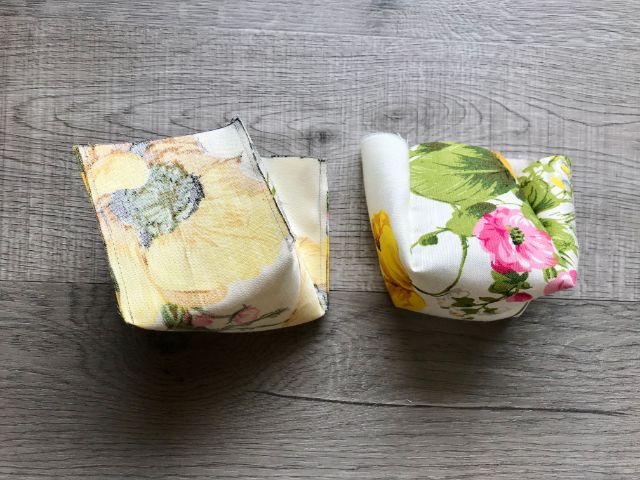
You should have two inside out boxes. Turn the one that will be the lining right side out.
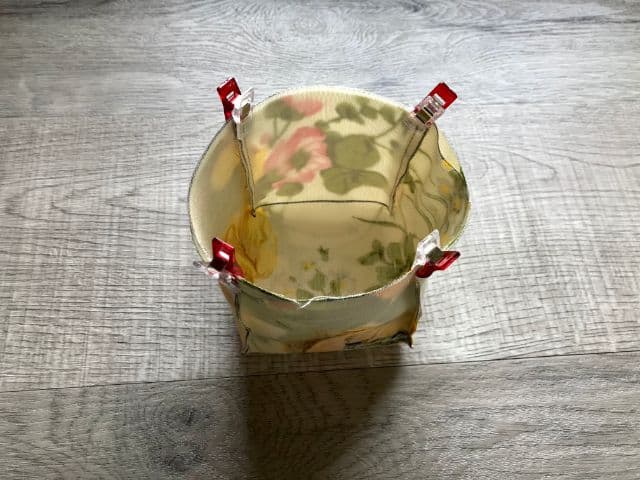
Next on this easy fabric basket tutorial, insert the lining into the exterior with right sides together. Line up the seams at each corner and clip to hold.
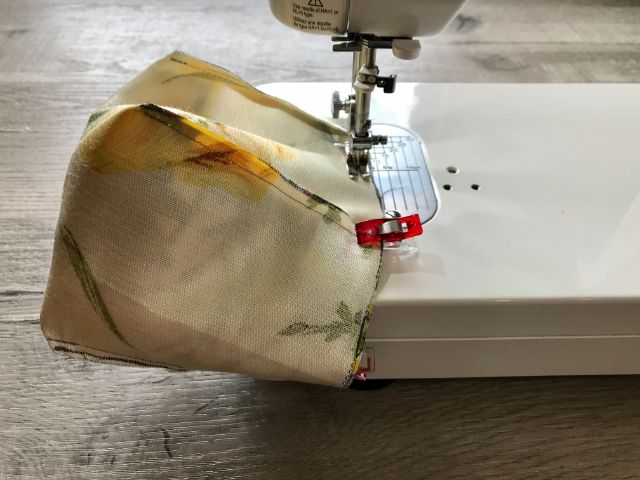
Now sew around the perimeter of the top, leaving a 2″ gap. Be careful not to catch the opposite side of the basket underneath while stitching.
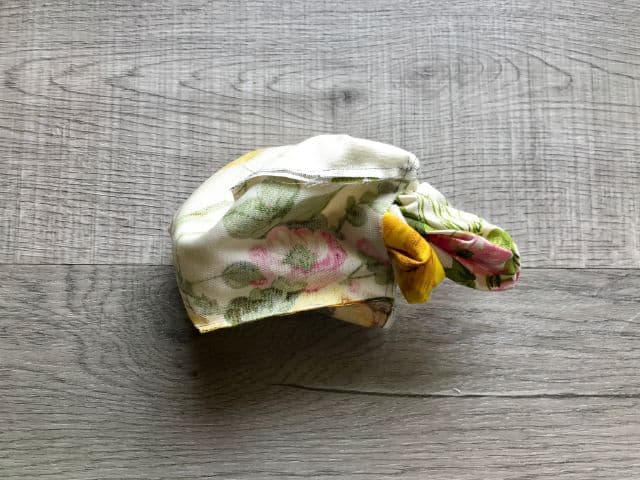
Carefully pull the lining through the gap. At this point, your creation probably doesn’t look anything like a basket. (See photo below.)
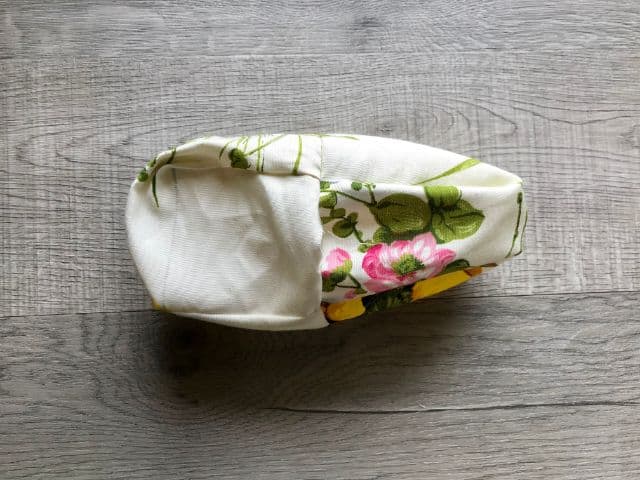
Push the lining into the exterior to form the basket shape again.
Turn the un-sewn gap under and press the entire basket.
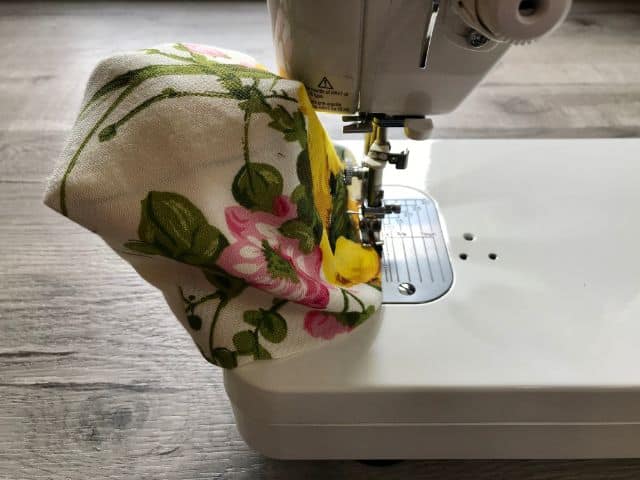
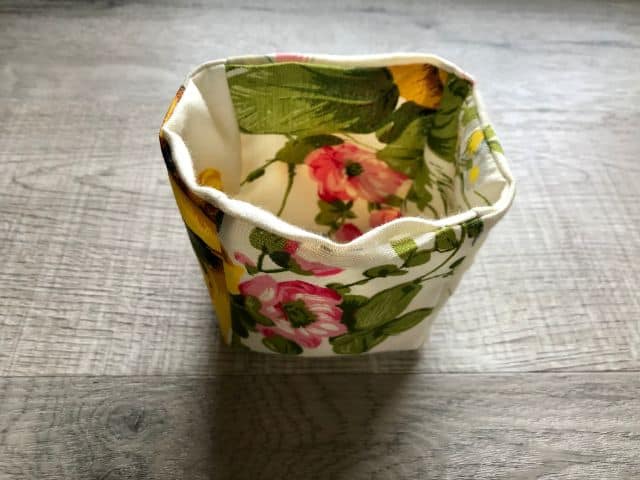
The final step in the easy fabric basket tutorial is to top stitch around the top of the basket.
Your basket is ready to fill! You may choose to fold down the top 1″ to reveal the lining fabric, or leave it as is. Now that you completed this easy fabric basket tutorial, you can make several baskets in different sizes. Just cut your fabric smaller or larger and follow the same steps above. Are you wondering if you need fabric baskets for yourself and what you will put in them? Here are some ideas to get you thinking. How many do you need now? Good thing they are quick to make!
What to Put in a Fabric Basket
- Cotton balls
- Cotton Swabs
- Pens
- Pencils
- Markers
- Nail polish
- Tea bags
- Sugar packets
- Sewing tools
- Wash cloths
- Remote controls
- Small toys
- First aid supplies
- Plants
Don’t forget to pin this project for later, and check out some more sewing projects for beginners listed below.

If you loved learning easy fabric basket sewing tutorial, make sure to pin it to your favorite Pinterest board or share it with friends on social media. If you decide to make this simple project on your own, make certain that you take a picture afterward and tag us on social media as we love seeing the fabrics and color choices that people use!
Fabric Basket Easy Sewing Tutorial

How to make a fabric basket in any size.
Materials
- 1/4 yard Heavy Fabric
- Coordinating Thread
Tools
- Fabric Shears
- Straight Pins
- Sewing Clips
- Iron
- Ironing Board
- Sewing Machine
Instructions
- Cut fabric to two 15" x 15" squares.
- Cut 5" square from each corner.
- Fold each piece with right sides together.
- Pin.
- Sew along each side with 1/4" seam allowance.
- Open, then fold to opposite sides.
- Pin.
- Sew remaining sides with 1/4" seam allowance.
- Turn lining right side out.
- Place lining inside exterior with right sides together.
- Line up seams.
- Clip.
- Sew top leaving 2" gap.
- Pull lining through 2" gap.
- Push lining into exterior.
- Turn gap under.
- Press entire basket.
- Top stitch around top.
Notes
- Fabric baskets can be made in any dimension divisible by 3. The ones shown started at 15" and 12" squares of fabric.
- Interfacing can be used to reinforce the fabric for more rigid baskets.
Recommended Products
As an Amazon Associate and member of other affiliate programs, I earn from qualifying purchases.
-
 MumCraft Multipurpose Sewing Clips with Tin Box Package, Assorted Colors, Pack of 100
 -
Grabbit Magnetic Sewing Pincushion with 50 Plastic Head Pins, Lime Green
-
Gingher 8-Inch Knife Edge Dressmaker's Shears
-
2-Pack - BLACK & WHITE - Coats & Clark Dual Duty All-Purpose Thread - One 400 Yard Spool each of BLACK & White